
Cooking Techniques & Kitchen essentials
How to Blanch Vegetables for Perfect Color, Flavor & Texture
Beautifully crisp, vibrant vegetables begin with one simple cooking technique.
Learn how to blanch vegetables with our easy step-by-step guide. Discover the secrets to preserving vibrant colors, achieving perfectly tender-crisp textures, and preparing vegetables ahead of time. Whether you’re making a fresh vegetable platter, planning a dinner party, or freezing seasonal produce, mastering this simple cooking technique makes meal preparation easier and more enjoyable.
Jump to Details & Helpful Tips
Use the links to explore the topics covered in this article and quickly navigate to the information you’re looking for.
Your Ultimate Guide to Blanching
If you’re keen on preserving the bright colors, crisp texture, and nutritional value of your vegetables, then you are reading the right guide. Today, we’re diving deep into the art of blanching vegetables—a simple yet essential technique that every home cook should master. Whether you’re prepping for a vegetable board or tray, quick stir-fry, freezing your garden bounty, planning meals in advance or just looking to upgrade your culinary skills, this guide will walk you through everything you need to know about blanching. Blanching not only enhances the appearance and texture of vegetables but also allows you to prepare them ahead of time. Simply reheat or season them right before serving, making meal prep both efficient and delightful.
What is Blanching?
Blanching is a simple cooking technique that involves briefly immersing vegetables in boiling water, then immediately transferring them to an ice bath to stop the cooking process. This method helps preserve their vibrant color, maintain a tender-crisp texture, and prepare vegetables for a variety of dishes.
Whether you’re preparing vegetables for a dinner party, making meals ahead of time, or freezing seasonal produce, blanching offers several advantages.
Color Preservation
Blanching enhances the natural colors of vegetables, making green beans, broccoli, asparagus, and other vegetables appear brighter and more vibrant. Quickly cooling them in an ice bath helps prevent overcooking and maintains their beautiful appearance.
Texture Enhancement
A brief dip in boiling water softens vegetables while allowing them to retain a pleasant crunch. By controlling the blanching time, you can achieve the perfect tender-crisp texture for salads, vegetable platters, and side dishes.
Flavor Enhancement
Blanching can mellow the strong or slightly bitter flavors of certain raw vegetables while allowing their natural sweetness and freshness to shine through. It also creates a wonderful foundation for adding butter, herbs, garlic, and other seasonings before serving.
Make-Ahead Convenience
One of my favorite benefits of blanching is being able to prepare vegetables ahead of time, especially when entertaining. Simply blanch, cool, drain, and refrigerate your vegetables until you’re ready to serve. A quick reheat with butter, olive oil, or your favorite seasonings makes preparing vegetable side dishes for dinner parties and holiday gatherings so much easier.
Preparation for Freezing
Blanching vegetables before freezing is an important step in preserving their quality, flavor, color, and texture. The brief exposure to boiling water slows or stops enzyme activity that can cause vegetables to deteriorate during frozen storage. Once blanched, vegetables should be cooled quickly, drained thoroughly, and dried before freezing. Proper packaging is equally important—removing excess air and using airtight, freezer-safe containers or bags helps minimize freezer burn and ice crystal buildup. With the right preparation, you can enjoy delicious, garden-fresh vegetables long after their growing season has ended.
How to Blanch Vegetables: A Step-by-Step Guide
Now that we’ve explored the fantastic benefits of blanching, let’s dive into how you can master this technique with your veggies.

Preparation
- Cleaning: Begin by thoroughly washing your vegetables under cool, running water to remove dirt, debris, and some surface residues. Gently rub the vegetables with your hands, or use a clean vegetable brush for firmer produce such as carrots and potatoes. While washing helps reduce surface contaminants, it does not eliminate all pesticide residues or harmful microorganisms. Starting with clean, fresh vegetables is an important first step toward achieving beautifully blanched vegetables.
- Cutting: Next, trim any stems and remove blemishes before cutting the vegetables into uniform sizes. This uniformity is vital as it ensures even cooking. Whether you’re cutting florets, slices, or cubes, consistent size means no piece is under or overcooked.
Boiling Water
- Water Proportions: For effective blanching, use a large pot that can comfortably hold the vegetables and water—approximately 4 quarts of water per 1 pound of vegetables is a standard ratio. This volume ensures the water temperature doesn’t drop too drastically when vegetables are added. Sometimes, I only need to cook a small amount of vegetables, so I simply use less water in the pot. This adjustment doesn’t affect the cooking process, allowing the vegetables to blanch perfectly even with a smaller volume of water.
- Seasoning the Water: Adding salt to your blanching water is optional, but I recommend it when preparing vegetables to serve immediately or reheat later. A little salt enhances their natural flavor and provides a subtle seasoning during cooking. For vegetables intended for freezing, salt is unnecessary because it does not contribute to preservation.
- The most important factor is using enough rapidly boiling water to maintain a consistent temperature when the vegetables are added. This ensures even cooking and helps preserve their beautiful color and texture.
- TIP: I add about 1/4 cup of sugar to the boiling water when blanching potatoes to remove the occasional bitterness of the skin.
- Bringing to a Boil: Place the pot on high heat and bring the water to a rapid boil. A vigorous boil is essential for quick and effective blanching.
Blanching Time
- Adding Vegetables: Carefully add your prepared vegetables to the boiling water, keeping the heat on high. The water should return to a boil quickly; if it takes longer than a minute, you may have added too many vegetables at once. Begin timing as soon as the vegetables enter the boiling water, and gently stir occasionally to ensure even cooking.
- The ideal blanching time depends on the type and size of the vegetable and how you plan to use it. When blanching vegetables for freezing, always follow the recommended blanching time for that specific vegetable. Underblanching can actually stimulate enzyme activity rather than stop it, while overblanching can negatively affect flavor, texture, and nutrients.
- If you’re blanching vegetables to serve immediately or preparing them ahead of time for reheating, you can adjust the cooking time to achieve your preferred texture. For example, vegetables served cold with a dip may benefit from a slightly longer cooking time for a tender-crisp, or al dente, texture. Remember that vegetables continue cooking until they are thoroughly cooled, so transfer them to an ice bath immediately after blanching.
- Stirring: Periodically, gently stir the vegetables to ensure even exposure to the heat. This helps maintain consistent texture and color throughout.
Ice Bath
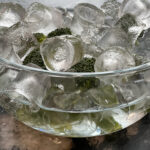
- Preparing the Ice Bath: While the vegetables are blanching, prepare an ice bath in a large bowl. Fill it with ice and cold water sufficient to submerge the blanched vegetables.
- Cooling the Vegetables: Once the blanching time is up, use a slotted spoon to immediately transfer the vegetables from the boiling water to the ice bath. This rapid cooling halts the cooking process, securing the texture and vibrant color.
- Maintaining the Bath’s Temperature: Stir the vegetables gently in the ice bath to ensure even cooling. Check the water temperature periodically; if the ice melts and the water warms up, add more ice to keep it cold.
Drain and Dry
- Draining: After the vegetables have cooled for approximately the same time they were blanched, drain them thoroughly.
- Drying: Once the vegetables have cooled completely, spread them in a single layer on a clean kitchen towel or paper towels. Gently pat them dry to remove excess surface moisture. This step is especially important when preparing vegetables for freezing, as removing excess water helps reduce surface ice buildup and prevents the vegetables from sticking together. Although some ice crystal formation is unavoidable during freezing, thoroughly drying your vegetables helps maintain their texture and overall quality during storage.
By following these detailed steps, you’ll ensure that your blanched vegetables are perfectly prepared, whether for immediate use or future enjoyment. This meticulous approach helps maximize flavor, texture, and nutritional value.
Blanching Times for Common Vegetables
Knowing how long to blanch vegetables is essential for achieving the perfect texture, color, and flavor. Blanching times vary depending on the vegetable, its size, and how you plan to use it. Whether you’re preparing vegetables for freezing, making them ahead for a dinner party, or serving them chilled with your favorite dip, this quick-reference chart will help you get started.
Vegetable Blanching Time Chart
The following times are general guidelines for water blanching vegetables before freezing.
| Vegetable | Prep | Blanching Time |
|---|---|---|
| Asparagus | Small spears | 2 minutes |
| Asparagus | Medium spears | 3 minutes |
| Asparagus | Large spears | 4 minutes |
| Broccoli | Florets, approximately 1½ inches | 3 minutes |
| Brussels sprouts | Small, whole | 3 minutes |
| Brussels sprouts | Medium, whole | 4 minutes |
| Brussels sprouts | Large, whole | 5 minutes |
| Carrots | Sliced or diced | 2 minutes |
| Carrots | Small, whole | 5 minutes |
| Cauliflower | Florets, approximately 1 inch | 3 minutes |
| Corn | Whole ears, small | 7 minutes |
| Corn | Whole ears, medium | 9 minutes |
| Corn | Whole ears, large | 11 minutes |
| Green beans | Trimmed, whole or cut | 3 minutes |
| Green peas | Shelled | 1½ minutes |
| Leafy greens | Spinach | 2 minutes |
| Leafy greens | Kale | 2 minutes |
| Summer squash | Sliced, approximately ½ inch | 3 minutes |
Important: These times are intended for preparing vegetables for freezing, not necessarily for serving them immediately. For vegetables you plan to eat chilled or reheat later, adjust the cooking time according to the desired tenderness. For freezing, follow the recommended blanching times rather than shortening them, because underblanching can negatively affect storage quality.
Tips for Using This Chart
Start your timer when the vegetables enter the boiling water. Keep the pot covered and the heat high so the water quickly returns to a boil.
Cool vegetables immediately. Transfer them to an ice bath after blanching. Most vegetables need approximately the same amount of cooling time as blanching time. Corn on the cob may require twice as long.
Blanch in batches. Avoid overcrowding the pot, which can lower the water temperature and cause uneven cooking.
Consider how you’ll serve them. Vegetables intended for a chilled platter may need a different cooking time than those being prepared for freezing.
Source: Blanching times adapted from the National Center for Home Food Preservation and University of Minnesota Extension.
Health Benefits of Blanching
Blanching vegetables offers more than beautiful colors and appealing textures. This quick cooking technique can make certain vegetables easier to digest, help limit nutrient loss compared to prolonged boiling, and reduce some naturally occurring compounds that affect mineral absorption. Understanding these benefits can help you make the most of your fresh vegetables.

Enhanced Digestibility
Blanching briefly softens the fibrous structure of vegetables, making them easier to chew and potentially easier to digest than their raw counterparts. Vegetables such as broccoli, kale, and green beans can become more tender without losing their desirable texture.
Although blanching doesn’t eliminate fiber, the gentle cooking process softens plant tissues, making certain vegetables more enjoyable for people who prefer cooked vegetables over raw ones.
Retention of Vitamins
Blanching vegetables is a quick cooking technique that can help minimize nutrient loss compared to prolonged boiling. Water-soluble vitamins, particularly vitamin C and certain B vitamins, are sensitive to heat and can leach into cooking water.
Because blanching requires only a short cooking time, it helps limit unnecessary nutrient loss, although some vitamins are still lost during the process. Immediately transferring vegetables to an ice bath stops further cooking, helping preserve their vibrant color and tender-crisp texture. When preparing vegetables for freezing, blanching also helps maintain their quality during storage.
Reduction of Certain Anti-Nutrients
Some vegetables naturally contain compounds known as anti-nutrients, such as oxalates, which can reduce the absorption of certain minerals. Blanching may help reduce some of these compounds, particularly those that dissolve into cooking water.
For example, blanching spinach can reduce some of its soluble oxalate content. However, the amount removed depends on the vegetable, cooking time, and preparation method. Blanching does not eliminate all anti-nutrients, and most vegetables remain nutritious whether enjoyed raw or cooked.
Food Safety Considerations
Blanching can reduce some microorganisms naturally present on the surface of vegetables, but it does not eliminate all potentially harmful bacteria or guarantee food safety. Because blanching involves only a brief exposure to boiling water, it should not be considered a substitute for thorough cooking when necessary.
Always wash fresh vegetables under running water before blanching, use clean utensils and preparation surfaces, and cool vegetables promptly after cooking. If preparing vegetables ahead of time, refrigerate them at 40°F (4°C) or below within two hours and use them within three to four days, or freeze them for longer storage.
How to Store Blanched Vegetables
Storing blanched vegetables properly is essential for maintaining their freshness, texture, nutritional value, and overall quality. Here’s a comprehensive guide on how to do it effectively:
Cooling Immediately
Immediately after blanching, it’s crucial to cool your vegetables quickly to halt the cooking process. Plunge them into an ice water bath, ensuring they are completely submerged. This rapid cooling helps preserve the vibrant color and crisp texture of the vegetables, which is essential for dishes where appearance and texture play a significant role. Keep the vegetables in the ice bath for the same amount of time they were blanched to ensure a uniform temperature shift.
Draining Well
Once the vegetables have fully cooled, drain them thoroughly. Allow them to sit in a colander for a few minutes to ensure all the water drips away. This step is crucial as any excess moisture left on the vegetables can lead to sogginess and might also promote spoilage, especially if the vegetables are stored in the refrigerator.
Drying Thoroughly
After draining, spread the vegetables out on clean kitchen towels or layers of paper towels. Gently pat them dry, removing as much surface moisture as possible. This drying process is particularly important if you plan to freeze the vegetables. Moisture left on the vegetables can turn into ice crystals in the freezer, which can rupture cell walls and result in a mushy texture upon thawing.
Packaging for Refrigeration
For short-term storage, which is typically a few days, opt for airtight containers or resealable plastic bags to store the blanched vegetables. To enhance moisture control, line the containers with paper towels to absorb any residual moisture that may escape from the vegetables. This step helps in keeping the vegetables dry and fresh. Store the containers in the crisper drawer of your refrigerator, where the temperature and humidity levels are regulated to be ideal for fresh produce.
Freezing Blanched Vegetables
For long-term storage, freezing blanched vegetables is an excellent option. To freeze, spread the dried vegetables out in a single layer on a baking sheet. This pre-freezing step prevents the vegetables from sticking together, allowing you to use only the amount needed later without having to defrost the entire batch. Place the baking sheet in the freezer until the vegetables are thoroughly frozen, usually a few hours.
Once the vegetables are frozen, transfer them into airtight freezer bags or containers. Remove as much air as possible from the bags to minimize freezer burn, which can degrade quality and texture. Label each bag or container with the type of vegetable and the date of freezing. Properly frozen, blanched vegetables can be stored for about 8-12 months in the freezer. The optimal freezer temperature is at or below 0°F (-18°C) to ensure the best preservation of quality.
By following these steps, you can maximize the shelf life and quality of your blanched vegetables, making them a convenient and healthy option for quick meals, while also ensuring they retain as much nutritional value as possible.
How to Reheat Blanched Vegetables
When you’re ready to use your refrigerated or frozen vegetables, reheating them correctly is crucial to maintain their ideal texture, color, and flavor. Here’s how to effectively reheat blanched vegetables using different methods, ensuring they remain as delightful as when they were first prepared:
Methods of Reheating Blanched Vegetables
Steaming
Steaming is one of the best methods for reheating vegetables as it is gentle and does not leach nutrients. To steam, set up a steamer basket over a pot of boiling water. Place the vegetables in the basket, cover, and steam just until they are heated through. This method is particularly good for denser vegetables like carrots, broccoli, or cauliflower, as it retains their structure and nutrients without making them soggy.
Sautéing
For a quicker reheating option, sautéing is perfect. Heat a little oil or butter in a pan over medium heat. Add the vegetables and cook until they are heated through. This method allows you to infuse the vegetables with additional flavors, such as garlic, herbs, or spices, enhancing the overall taste and making them feel freshly prepared.
Microwaving
If you’re short on time, microwaving is a convenient and quick method. Place the vegetables in a microwave-safe dish, add a splash of water to help generate steam, and cover with a microwave-safe lid or plastic wrap. Microwave on high for a few minutes until hot. However, be vigilant to not overcook as this can quickly lead to soggy and unappealing vegetables.
Boiling
Quickly reheating vegetables by plunging them back into boiling water for a minute or two is effective, especially if you’re adding them to another dish like a soup or pasta. This method is fast and ensures that the vegetables are just heated through without becoming overcooked.
Baking
For larger batches or when you desire a slightly crispy texture, baking or roasting is an excellent choice. Spread the vegetables in a single layer on a baking sheet, lightly drizzle with oil, and bake in a preheated oven at around 375°F (190°C) until they are heated through. This method is particularly suited for vegetables like squash, potatoes, and cauliflower, as it can enhance their flavor and texture.
Ways to Use Blanched Vegetables
In the freezer, blanched vegetables maintain their quality, making them a fantastic option for storing seasonal produce to enjoy year-round. Whether used in cooking or as a standalone dish, blanched vegetables bring convenience and culinary appeal to the table.
Blanched vegetables are incredibly versatile and can be incorporated into a variety of dishes, enhancing both flavor and nutrition. They are perfect for salads, providing a vibrant, crisp addition that stands out both visually and texturally. Blanched vegetables also excel in stir-fries, where pre-cooking them slightly allows for quicker and more even frying later. For meal preppers, blanched vegetables are a time-saver, able to be reheated quickly and seasoned in various ways to complement any meal. Additionally, they make excellent, healthy snacks when served with dips or light seasoning. This is one of my go-to methods when prepping a vegetable tray, crudité tray or fresh vegetable board.
Expert Tips for Blanching Vegetables
Here are some expert tips for blanching vegetables that will help ensure the best results, whether you’re a novice in the kitchen or looking to refine your blanching technique:
1. Blanch Vegetables Ahead of Time
One of the biggest advantages of blanching is being able to prepare vegetables before your guests arrive. I often blanch vegetables earlier in the day, cool them in an ice bath, and refrigerate them until I’m ready to serve. A quick sauté with butter, olive oil, or your favorite seasonings is all it takes to finish them. It’s a wonderful way to simplify dinner parties and holiday meals without sacrificing flavor or presentation.
2. Cook Vegetables According to How You’ll Serve Them
Not all blanched vegetables need the same degree of tenderness. If you’re planning to reheat them later, I recommend leaving them slightly firm so they don’t become overcooked during reheating. For vegetable platters or salads served cold, blanch them until they’re pleasantly tender-crisp. When preparing vegetables for freezing, always follow the recommended blanching times to preserve their quality during storage.
3. Blanch Different Vegetables Separately
When preparing a colorful assortment of vegetables, blanch each variety separately rather than cooking everything together. Broccoli, carrots, asparagus, and green beans all require different cooking times. Cooking them individually ensures each vegetable reaches the ideal texture. You can reuse the same boiling water for multiple batches, provided it remains clean and returns to a full boil between batches.
4. Add Seasonings Just Before Serving
Blanching creates a wonderful foundation for flavorful vegetable side dishes. Rather than adding all your seasonings during the initial cooking process, wait until you’re ready to serve. Toss warm vegetables with melted butter, fresh herbs, garlic, lemon zest, or a drizzle of extra virgin olive oil. This simple finishing touch enhances their natural flavors and makes even the simplest vegetables feel special.
5. Plan Your Portions for Effortless Entertaining
When hosting a dinner party or holiday gathering, blanching vegetables in advance makes preparing larger quantities much easier. I like to portion my vegetables according to the number of guests, then refrigerate them in airtight containers until needed. As a general guideline, plan on approximately ½ to ¾ cup of cooked vegetables per person when serving them as a side dish. Having everything prepared and ready to reheat allows you to spend less time cooking and more time enjoying your guests.
History of Blanching Vegetables
Blanching has a long history in cooking, although its exact origins are difficult to trace. For centuries, cooks have used brief cooking techniques to soften vegetables, reduce bitterness, and prepare ingredients for additional cooking or preservation.
As food preservation techniques developed, blanching became increasingly important in commercial food processing. By the twentieth century, the growing popularity of frozen vegetables made blanching a standard preparation method because it helps slow enzyme activity that can negatively affect flavor, color, and texture during frozen storage.
Today, blanching remains a valuable technique in both professional and home kitchens. Beyond preparing vegetables for freezing, it’s a wonderful way to achieve vibrant colors, tender-crisp textures, and beautifully prepared vegetables that can be finished just before serving.
FAQs about Blanching
Frequently Asked Questions
Find answers to common questions, along with helpful tips and practical advice.
What is the purpose of blanching vegetables?
Blanching vegetables serves multiple purposes: it locks in the vibrant colors, stops enzyme actions that can lead to spoilage, softens vegetables slightly while preserving their texture, and cleanses the surface of dirt and organisms. This technique is especially useful for meal preparation and freezing.
How long should I blanch vegetables?
Blanching times vary depending on the type and size of vegetable and how you plan to use it. For freezing, broccoli florets and green beans typically require 3 minutes, while sliced carrots need approximately 2 minutes. Refer to our Vegetable Blanching Time Chart above for recommended times for specific vegetables. If you’re preparing vegetables to serve immediately, adjust the cooking time to achieve your preferred tenderness.
Can I reuse the blanching water?
Yes, you can reuse blanching water for the same batch of cooking. It’s best used when blanching large quantities of vegetables in succession. However, you should discard the water after use to avoid any build-up of flavors and potential cross-contamination.
Do I need to season the water for blanching?
While not necessary, adding salt to the blanching water can enhance the flavor of the vegetables. It’s similar to seasoning pasta water; just a pinch can make a difference. Be adventurous and even add herbs to flavor the water like added fresh dill to the water when blanching carrots.
What’s the best way to cool vegetables after blanching?
The best way to cool blanched vegetables is by immediately transferring them to a bowl of ice water. This stops the cooking process quickly and preserves the texture and color. Keep the vegetables in the ice bath for the same duration as they were blanched.
How do I store blanched vegetables?
Blanched vegetables should be dried thoroughly after cooling and then stored in airtight containers. For refrigeration, use them within a few days. For longer storage, freeze them by first spreading them on a baking sheet to freeze individually, then transferring to airtight bags where they can be stored for 8-12 months.
Can blanched vegetables be reheated?
Yes, blanched vegetables can easily be reheated. You can steam, sauté, microwave, boil, or bake them just until they are warmed through. Be careful not to overcook them during reheating to maintain their best texture and flavor.
Does blanching kill nutrients in vegetables?
Blanching can cause some water-soluble vitamins (like vitamin C and some B vitamins) to leach into the water. However, the quick nature of this process means that the overall nutrient loss is less significant compared to longer cooking methods. Plus, blanching can actually enhance the availability of some nutrients and reduce anti-nutrients.
Is it necessary to blanch vegetables before freezing?
Blanching is recommended before freezing most vegetables because it slows or stops enzyme activity that can negatively affect their flavor, color, and texture during storage. Although blanching helps preserve quality, it does not guarantee food safety. Always follow proper food handling, cooling, and freezing practices for the best results.
Can I eat the vegetables immediately after blanching?
Yes, you can eat the vegetables immediately after blanching. One of my favorite items to blanch and eat is green beans! Nothing any more refreshing for a snack in the heat of summer!